MacIPRpi: MacIP on a Raspberry Pi. Running on Netatalk 4.1.1.
Latest release
MacIPRpi-6.02 (1.7G)
MD5 hash: a9205b2220c39dfbc323965d16b90d7c
MacIP.net gives you a MacIP gateway out of the box on a Raspberry Pi thanks to the Linux port of macipgw done by Stefan Bethke. And the MacIPRpi is loaded with software to get you going with file sharing with almost any computer. New or old. Macintosh or non Macintosh.
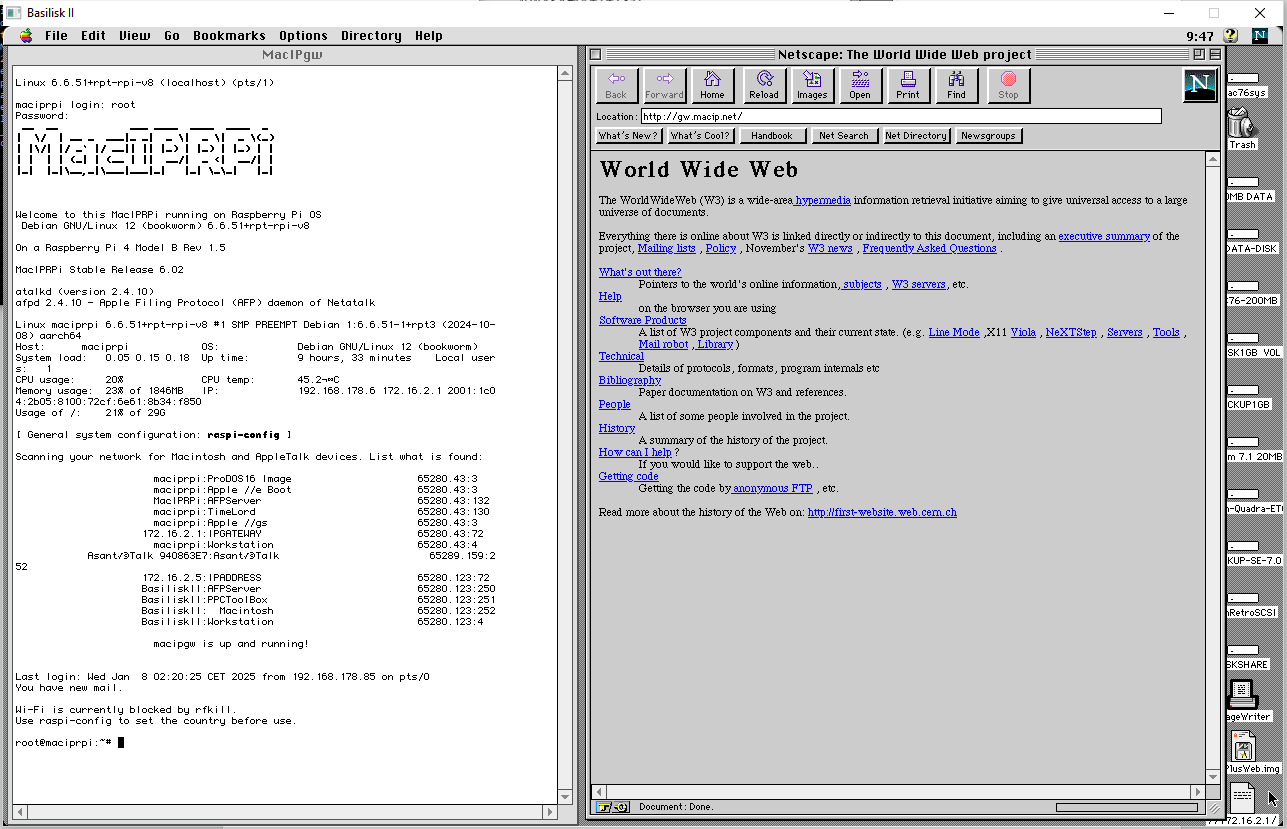
MacIPRpi at work for a MacIP session in BaseliskII emulator
Macintosh computers can connect to each other using LocalTalk by linking their printer ports with appropriate cabling. However, a LocalTalk network cannot directly communicate using TCP/IP to access the Internet. To bridge this gap, IP packets must be encapsulated within the AppleTalk DDP protocol to travel across the LocalTalk network.
A specialized piece of hardware or software is required to perform this encapsulation and decapsulation. This device unpacks the TCP/IP packets from the AppleTalk protocol and forwards them to other TCP/IP networks, enabling communication with the Internet.
In the old days we had router devices like a
FastPath
to do this. Now a combination of a LocalTalk bridge and a MacIPRpi can do the trick.
Their are two types of LocalTalk bridges you can use:
-
Hardware, like a
AsantéTalk
or
Dayna Mini EtherPrint
https://en.wikipedia.org/wiki/LocalTalk-to-Ethernet_bridge
You can find them on Ebay or (local) Craigslist, -
If you have an extra Macintosh with both Ethernet and LocalTalk you can use a software solution. See:
https://www.macintoshrepository.org/1481-localtalk-bridge-2-1
If you have a LocalTalk bridge you can use the MacIPRpi. If you don’t have one you can use an emulator like BasiliskII or SheepShaver to play around.
I tested myself on a
Raspberry Pi 4. Use a 16 GB SD card or bigger.
Use command
ddon Linux systems (and MacOSX) to put the image on the SD disk.
This will be a command like this:
xz -d < MacIPRpi-6.02.img.xz | dd of=/dev/sdX bs=1M
On a Linux/Unix/MacOSX system you can check the name of the SD card with the command:
dmesg
On Mac/Linux/Windows you can also use:
Raspberry Pi Imager
If you have to choose an Operating System, choose for Custom / Select a custom .img from your computer.
And then select the MacIPRpi-6.02.img.xz file. No need to unzip first.
Etcher is also a nice program to use:
Etcher
After the first boot the MacIPRpi will reboot to adjust to the maximum size of the SD card. So be patience. General rule of thumb is to wait ten minutes before use. The MacRPI is ready if you see the red light flashing.
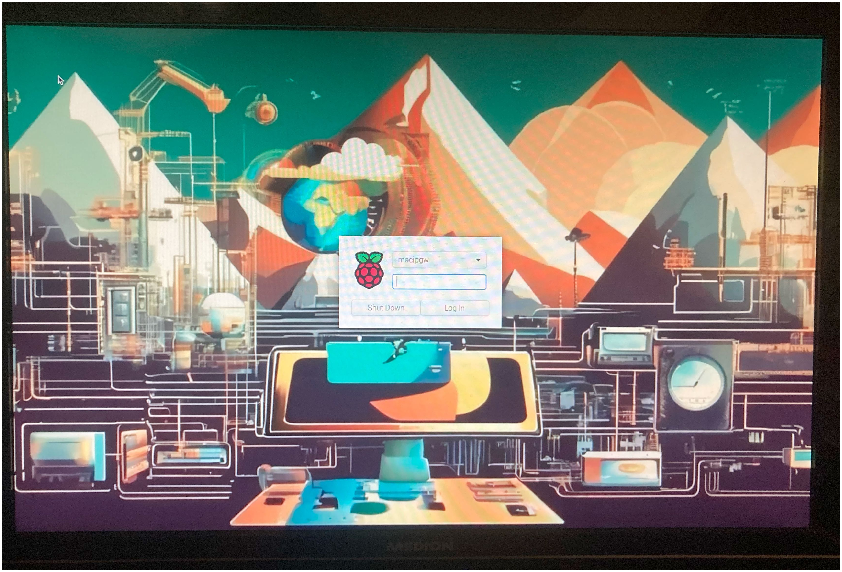
Connect your MacIPRpi to your network with a network cable. Do not try to connect the MacIPRpi with wifi. No Appletalk over WIFI! Also don’t try to connect it directly to a Macintosh with some kind of cabling trick… Just treat it as one of you home computers. Use it behind a router/firewall with no open connection from the Internet for security.
It will get an IP address from your (home) router if you power it on. After a few minutes it will be ready. At first boot it will also restart to adjust to the current used SD card. So to be sure let it run for 5 minutes. Take this time because the appletalk daemon needs some time to settle. It is ready when the red led starts blinking. Even no need to connect a monitor.
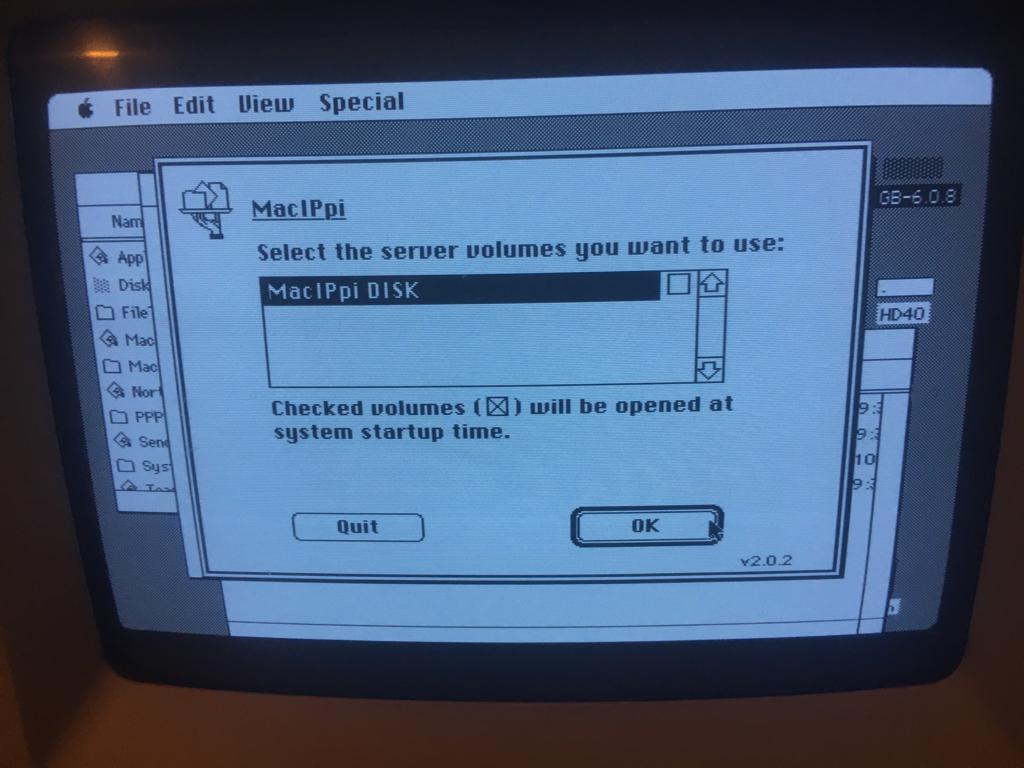
You set your Mac with MacTCP on f.i. 172.16.2.2 (anything between 172.16.2.2 and 254, subnet mask 255.255.255.0), as gateway 172.16.2.1 and DNS 8.8.8.8. Or do the same with a TCP/IP control panle, but then choose Connect via: AppleTalk (MacIP) and configure:Using MacIP manually. Same IP information.
Start a TCP/IP kind of program like, Fetch, Telnet or a browser and of you go to the Internet!
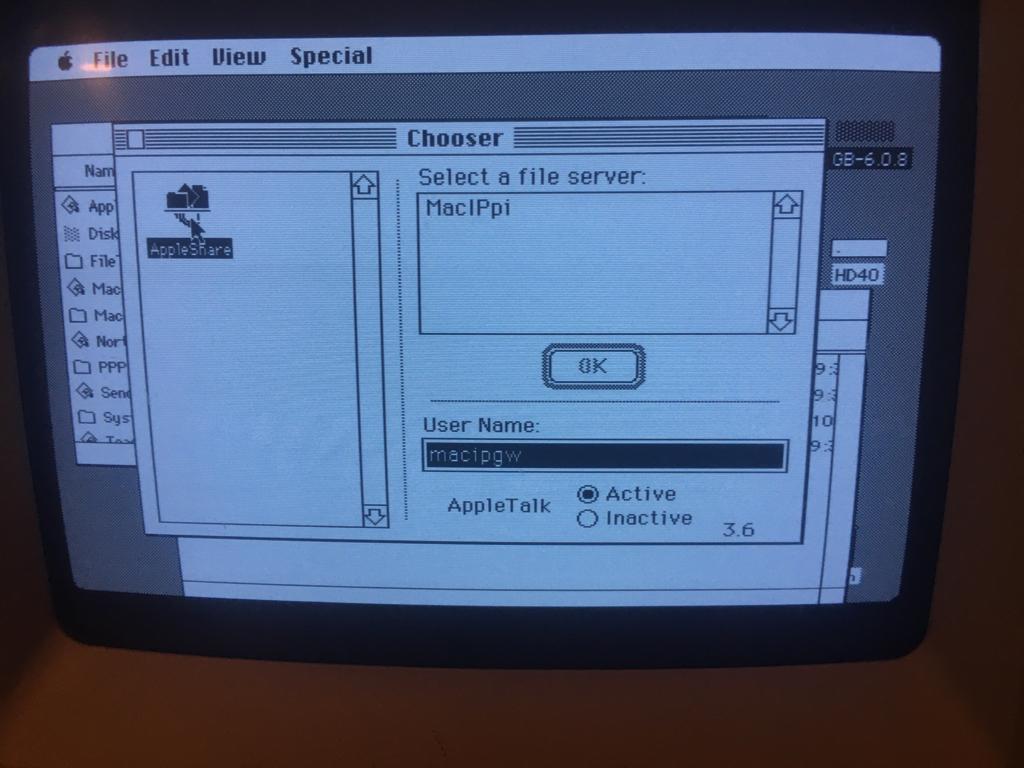
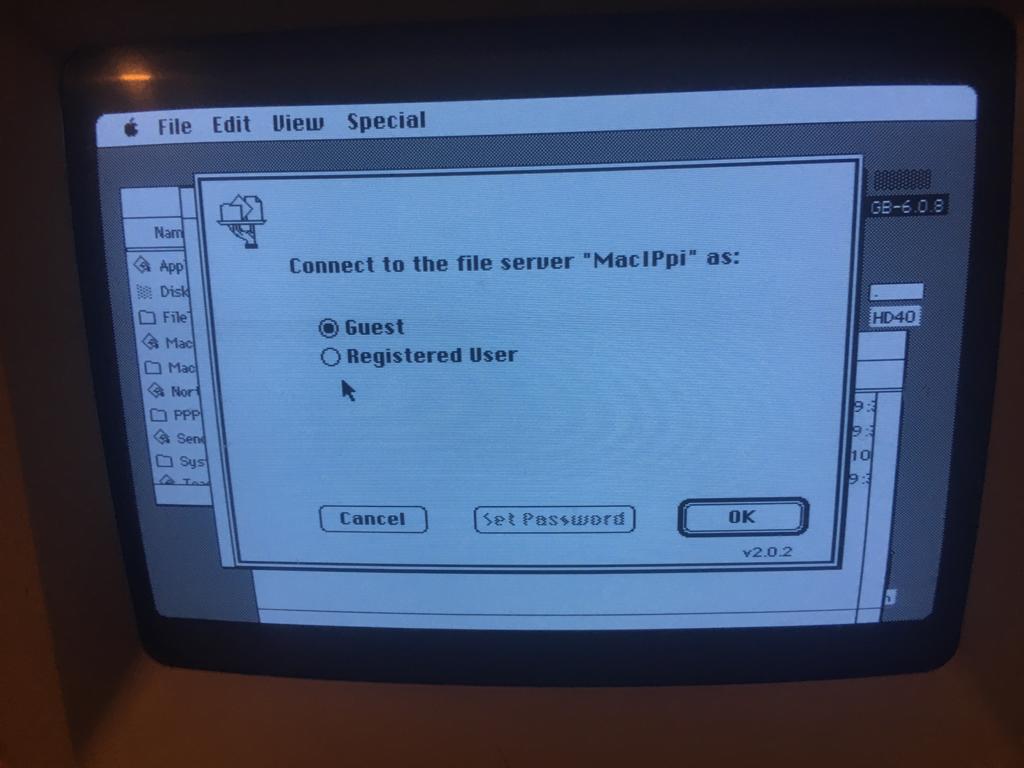
If you want you can login from your Macintosh with Telnet or SSH. On your old Macintosh with MacIP configured you can access it by IP address 172.16.2.1.
If you want to connect from a Mac OSX, Windows or Linux machine you can connect to maciprpi.local. If you want to login username is: macipgw and password: macipgw
You can become root by entering
$sudo -i
and password macipgw
What does the MacIPRpi gives you?
-
You can now surf the Internet out of the box with a LocalTalk only Macintosh. Or use AppleTalk (MacIP) in your emulator.
Use the IP information as in this image:
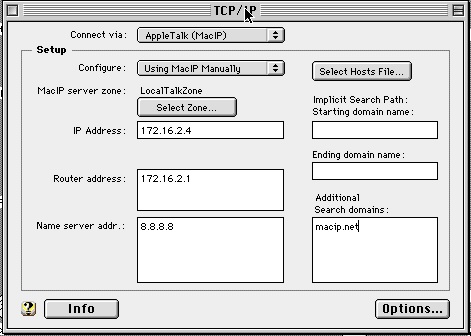
credits to: https://github.com/jasonking3/macipgw
-
Newest version of the Web Rendering Proxy on port 8080.
http://maciprpi.local:8080/ or on MacIP http://gw.macip.net:8080
Just visit the MacIPRpi with your old browser and see internet pages as images. Remember that is now more ‘a browser in a browser’ then a proxy. Don’t use it as proxy in your browsers settings.


credits to: https://github.com/tenox7/wrp
-
Full file sharing.
– For old school Macintosh 512k, Plus, SE, etc. and System 7, 8, 9 Macs
– MacOS X
– Windows
– Linux
– iPhone
– iPad
– Android
You can login as guest or as user macipgw.
Also anonymous FTP is supported.
You will always land in the same map and you can share files between different computers and operating systems.
Thanks to: Netatalk 4.1.1, Samba
http://netatalk.sourceforge.net/
https://github.com/Netatalk/netatalk/tree/branch-netatalk-4-1
https://www.samba.org/
Sorry. Some pictures are a little bit old.... but this is how it looks sort of...
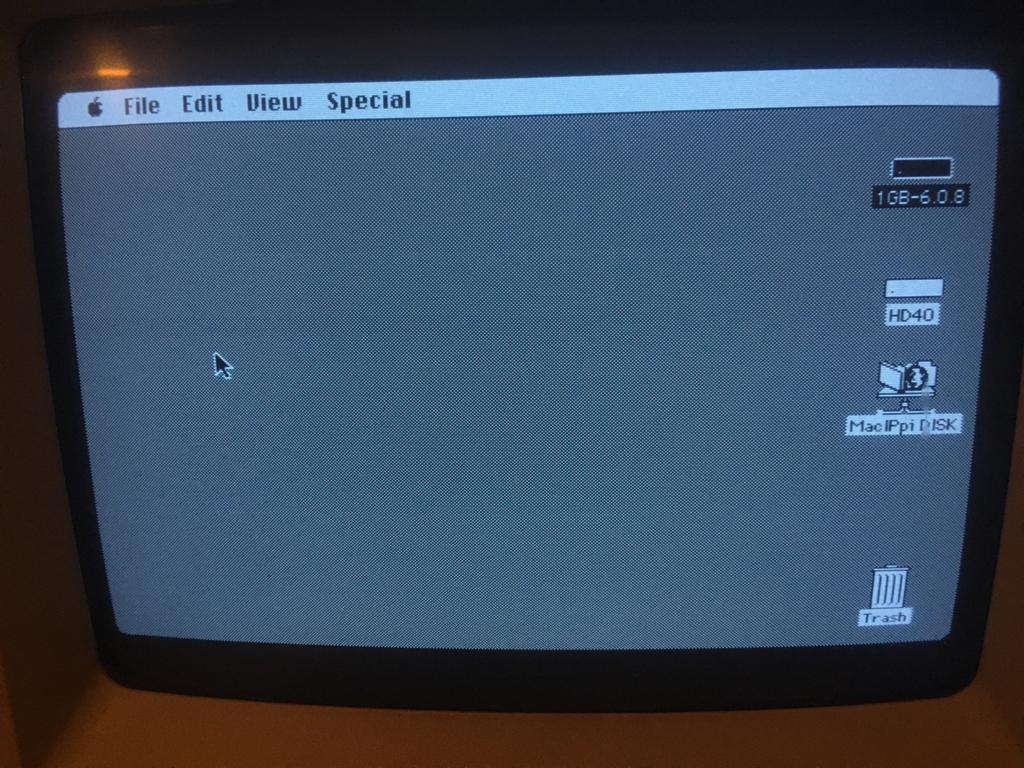

MacIPRpi seen from a Windows machine
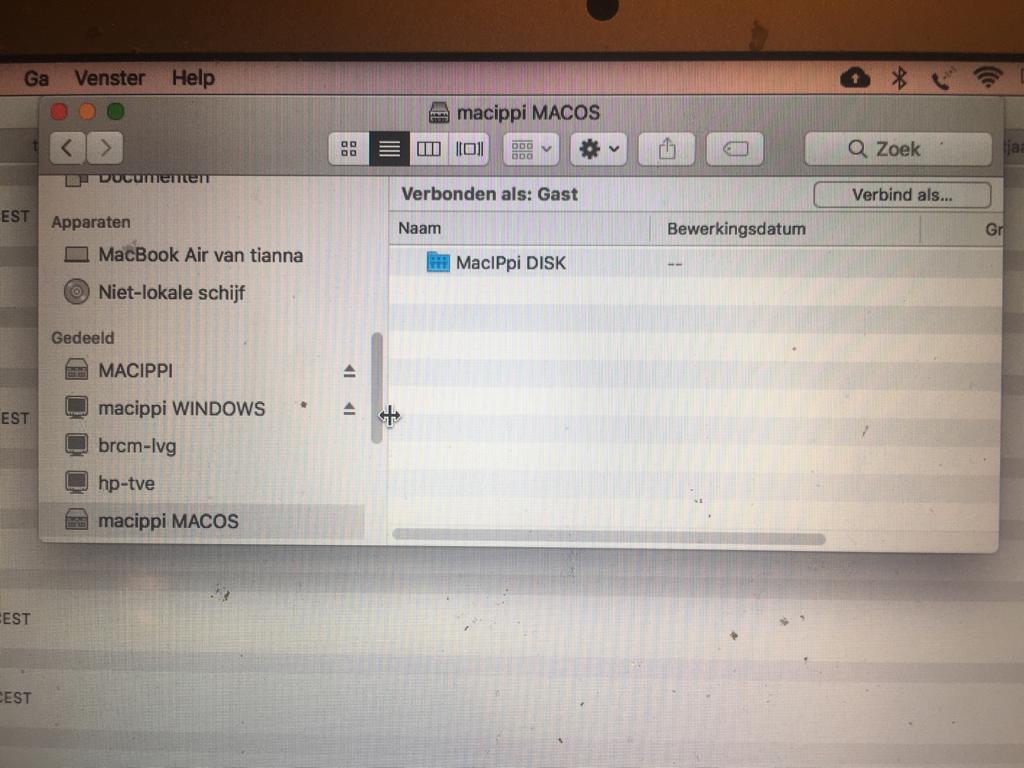
MacIPRpi seen from an Apple MacBook
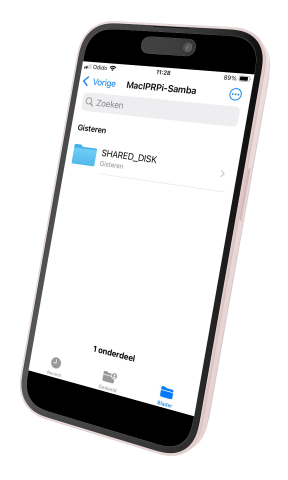
MacIPRpi seen from a iPhone
-
HTTP 1.1 to HTTP 1.0 proxy. Running om port 8082. You can use this proxy for really old browsers which can not use http 1.1
credits to: https://www.jwz.org/hacks/
https://www.jwz.org/blog/2008/03/happy-run-some-old-web-browsers-day/
-
WebOne proxy on port 8081
A HTTP 1.x proxy server that makes old web browsers and media players usable again in the Web 2.0 world. It deals with https for you.
credits to: https://github.com/atauenis/webone
-
TimeLord
In 1990, the University of Melbourne built a pair of tools called Timelord. Netatalk (heart of the MacIPRpi) has a version to. It never worked until revived by 68kmla.org forum member cheesestraws.
Now on the MacIPRpi in your Chooser.
credits to: cheesestraws,
68kmla.org/bb/index.php?threads/doctorin-the-tardis-and-timelord-the-revived-appletalk-time-server.38553
For ‘power users’ who want to do more with a MacIPRpi.
-
It is a full usable Linux machine. LXDE as window manager. You can connect to it with
X2go
or
RDP.
On a Windows 10 or 11 machine you can use this cmd line command:
mstsc /v:maciprpi.local
Or connect a monitor, keyboard and mouse. Remember to login with user macipgw. You can set console/gui auto-login/no autologin in raspi-config
(1. System Options / S5 Boot / Auto Login Select boot into desktop or to command line) - Splash boot screen for quiet boot, but adjustable in raspi-config
(1. System Options / S6 Splash Screen Choose graphical splash screen or text boot) - Gparted for disk management
-
Rpi monitor for system stats.
on http://maciprpi.local:8888/

- sshd started at boot. User macipgw can login with ssh. Password is also macipgw. If you like you can login as root with password macipgw or do a sudo su and enter the macipgw user password: macipgw
- telnetd started at boot. You can login (as user macipgw or root) with telnet.
- macipgw user password is macipgw, root password is macipgw
- Host name resolution. You can point to gw.macip.net and it is resolved as 172.16.2.1 and you can point to mac04.macip.net as your Macintosh with IP address 172.16.2.4.
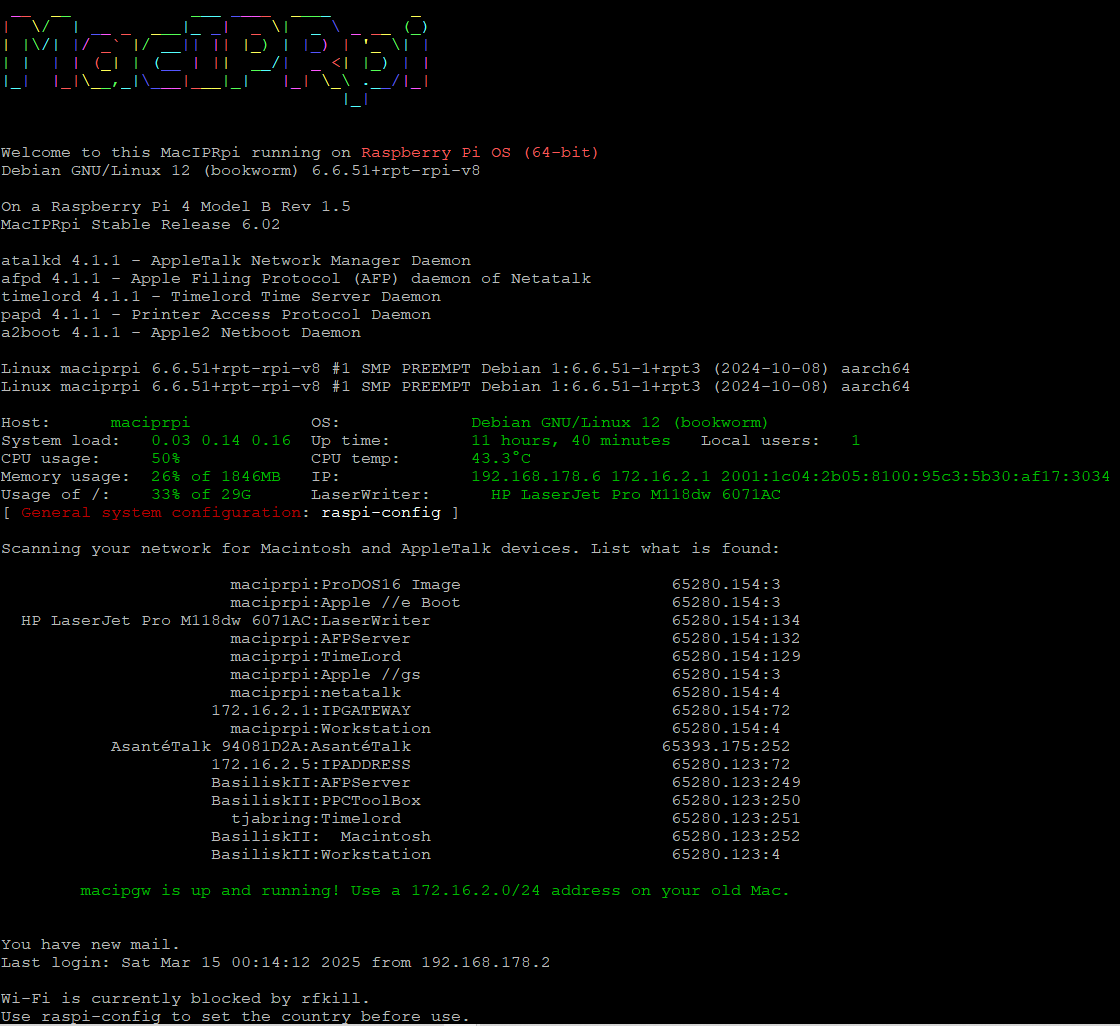
- Dynamic motd. You see a lot of information, like all the Apple/Macintosh and AppleTalk devices in your network
- AFP-Perl. This is a Perl module that provides support for the Apple Filing Protocol (AFP). It allows you to interact programmatically with AFP servers. Examples are in /usr/local/bin.
https://github.com/demonfoo/afp-perl- echo.pl
- afp_acl.pl
- afp_chpass.pl
- afpclient.pl
- afp-discover.pl
- afp-mdns-test.pl
- afpmount.pl
- getzones.pl
- nbplkup.pl
afp-mdns-test.pl is more extensive and even shows VolumeIcon in ascii.
and.... chooser.pl is an attempt to make a command line Chooser.
- afpfs-ng/libafpclient is an open-source client for the Apple Filing Protocol (AFP) written in C. It allows access to AFP shares from Mac OS X, Linux (via Netatalk), Apple Airport, Time Capsule, and various NAS devices. It supports mounting AFP shares using FUSE or a command-line client. This project, now maintained by rdmark is a continuation of multiple forks, originally by Alex deVries and then Simon Vetter.
Here is an example how to use it on the MacIPRpi just to show how it works:root@maciprpi:~# mount_afpfs "afp://localhost/MacIPRpi DISK" /tmp/afp The afpfs daemon does not appear to be running for uid 0, let me start it for you Mounting MacIPRpi DISK from localhost on /tmp/afp fuse version=29 args={'maciprpi:MacIPRpi DISK','/tmp/afp','-f','-osubtype=afpfs,fsname=@maciprpi:MacIPRpi DISK'} Mounting of volume MacIPRpi DISK from server maciprpi succeeded.
afpgetstatus can be used to get infomation about teh AFP server. IPv4 and IPv6 only, no AppleTalk.
(afpgetstatus -i will give you the nice ascii logo of the AFP server!)
root@maciprpi:~# afpgetstatus localhost
AFP response from localhost:548 via IPv6
Attempting connection to ::1 ...
Server name: maciprpi
Server type: Netatalk4.1.1
AFP versions:
        AFP2.2
        AFPX03
        AFP3.1
        AFP3.2
        AFP3.3
        AFP3.4
UAMs:
        No User Authent
        Cleartxt Passwrd
        DHCAST128
Flags:
        SupportsCopyFile
        SupportsServerMessages
        SupportsServerSignature
        SupportsTCP/IP
        SupportsSrvrNotifications
        SupportsOpenDirectory
        SupportsUTF8Servername
        SupportsUUIDs
        SupportsExtSleep
        SupportsSuperClient
Signature:
        a9 31 26 2c 26 03 66 89 cc 46 0d f1 4d aa 82 3d
        .1&,&.f..F..M..=
Resolved IPv6 address: ::1
Resolved IPv4 address: 127.0.0.1
https://github.com/rdmark/afpfs-ng - Print support out of the box. MacIPRpi will try to find every capabele printer on the network and make it available for old Macintosh.
You can also test if everything works on the commandline:
root@maciprpi:~# papd-test.sh
Print mode disabled. Only checking printer status.
Searching for available AppleTalk printers...
Found AppleTalk printers:
HP LaserJet Pro M118dw 6071AC
Checking status of "HP LaserJet Pro M118dw 6071AC"... Available
Skipping print job for "HP LaserJet Pro M118dw 6071AC".
If you really want to print a test page add --print
root@maciprpi:~# papd-test.sh --print
Print mode enabled.
Searching for available AppleTalk printers...
Found AppleTalk printers:
HP LaserJet Pro M118dw 6071AC
Checking status of "HP LaserJet Pro M118dw 6071AC"... Available
Sending enhanced PostScript test print to "HP LaserJet Pro M118dw 6071AC"...
Trying 65280.214:134 ...
status: idle; info: "HP_LaserJet_Pro_M118dw_6071AC" is ready ;
%%[ status: idle; info: "HP_LaserJet_Pro_M118dw_6071AC" is ready ;  ]%%
Connected to HP LaserJet Pro M118dw 6071AC:LaserWriter@*.
%%[ status: idle; info: "HP_LaserJet_Pro_M118dw_6071AC" is ready ;  ]%%
%%[ status: idle; info: "HP_LaserJet_Pro_M118dw_6071AC" is ready ;  ]%%
%%[ status: idle; info: "HP_LaserJet_Pro_M118dw_6071AC" is ready ;  ]%%
%%[ status: idle; info: "HP_LaserJet_Pro_M118dw_6071AC" is ready ;  ]%%
%%[ status: idle; info: "HP_LaserJet_Pro_M118dw_6071AC" is ready ;  ]%%
Connection closed.
Print job sent successfully.
Disclaimer: Printing a real page will only work on Laser printers. And also no guaranty because I have only one to test..... On the Netatalk web site is a nice manual how to use the AppleTalk compatible printer server papd.
https://netatalk.io/docs/Print-Server - Nice check script to see if everything is working:
root@maciprpi:~# check-maciprpi.sh --allor each module:Usage: check-maciprpi.sh [options] Options: -a Run all tests except --print-page --help Display this help message --webone Check WebOne Proxy --url Test URLs --services Check required services --packages Installed packages --tftp Test TFTP functionality --afpfs-ng Test afpfs-ng mount --afp-perl Check afp-discover.pl --httpd Check if the HTTPD homepage is accessible --print Test print status --print-page Send a real print job --ports Test ports --samba Test Samba --tcpdump Test tcpdump to tun0, the 172.16.2.0/24 network --all Run all tests including --print-page --all-no-print Run all tests except --print-page (same as -a) Example: check-maciprpi.sh --webone --tftp Example: check-maciprpi.sh -a
Disclaimer: Printing a real page will only work on Laser printers. And also no guaranty because I have only one to test..... - Installed nmap for testing
- Installed aecho for testing
- Installed nbplkup for finding AppleTalk devices
-
Installed tcpdump for listening to atalk packages.
(tcpdump -i eth0 atalk) - For ftp login with the macipgw account use password macipgw. Or anonymous login with user anonymous and any password. Anonymous can upload in directory incoming (/AppleShare/SHARED_DISK/FTP/incoming)
-
Web server on port 80 so you can test a web browser. Point your historic browser to http://maciprpi.local or http://172.16.2.1 and you will see a web page based on the first web site at CERN (Geneva, Switzerland)

Yes... Own picture...I have been at the spot at CERN in 2024 ...
Where the World Wide Web was born
See also: http://info.cern.ch – home of the first website - Lynx web browser. The text only web browser so you can surf the web like in the old days.
- Elinks web browser. The text only web browser so you can surf the web like in the old days.
- You can find more information about macipgw and the linux port on: https://github.com/zero2sixd/macipgw
- Raspbian Pi OS Lite with kernel:
Linux maciprpi 6.6.51+rpt-rpi-v8 #1 SMP PREEMPT Debian 1:6.6.51-1+rpt3 (2024-10-08) aarch64 - raspi-config for advanced configuration
- Avahi zeroconf in place. You can find it on your network with DNS: maciprpi.local
- Add any package you want to add. Use apt install .. to install and apt-cache search … to find packages
If you have feedback or tips you can reach me at info (at) macip.net or at the 68kmla forum:
https://68kmla.org/bb/index.php?members/mactjaap.895/
